How to split screen on Windows 10 Computer using Multitasking Snap Windows
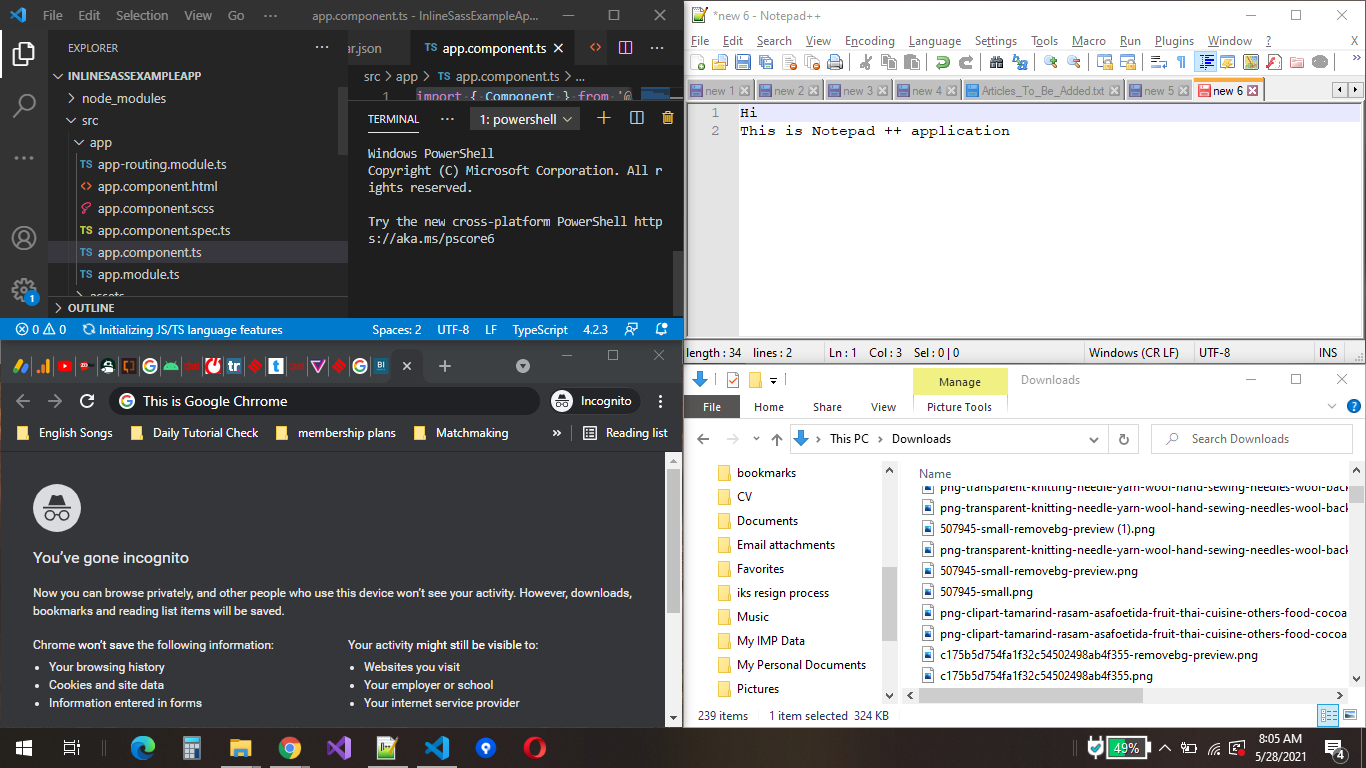
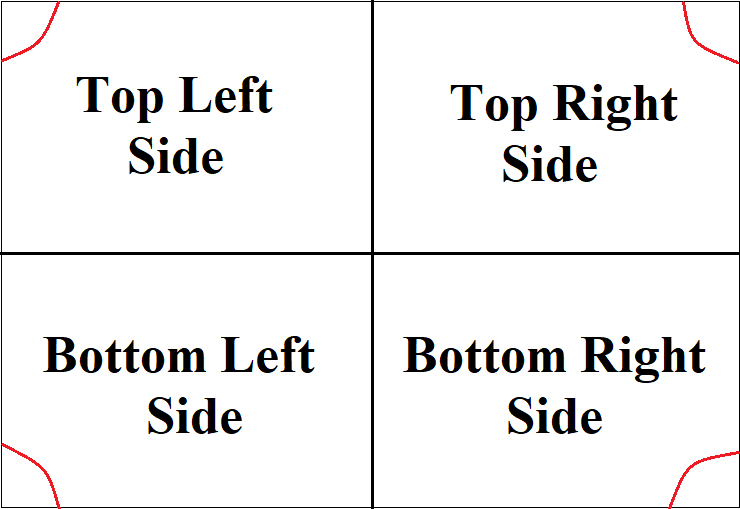
Sometimes you have the requirement to split the screen to let you work simultaneously on the multiple apps in the Windows 10 operating System, Multitasking Snap Windows feature in Windows will help you to split screen in multiple sides. In Windows 10 we can split screen up to 4 sides (to top left, to bottom left, to top right & to bottom right). Below image shows we have split the screen in 4 different sides on Windows 10:
Benefit of Split Screen:
1. We can work simultaneously on the required apps, e.g. We are developing and running an application, we can keep open Browser open on one side where app will run and we can keep editor open on other side where we will write code.
2. We can open YouTube one one side and we can open Excel/Word/Presentation on the other side at the same time, so that we can work on documents at the same time we can watch Videos.
3. We can keep the document's older version and new version open in two different sides of the screen, so that we can compare both the files at the same time.
4. We can keep the 2 folders open on different sides of the screen, so that we can drag files/folder from one side of the screen and drop it to the other side of the screen in another folder / drive.
5. We can move files from our local drive to the Google Drive / Microsoft OneDrive to achieve this, open the local drive folder of our computer on the one side of the screen and open Google Drive / Microsoft OneDrive on the other side of the windows and drag files from Local drive / folder and drop it to Google Drive / Microsoft OneDrive, it will automatically start uploading the files once you drop there.
Let's understand how to enable & disable Split Screen's Multitasking Snap Window Feature:
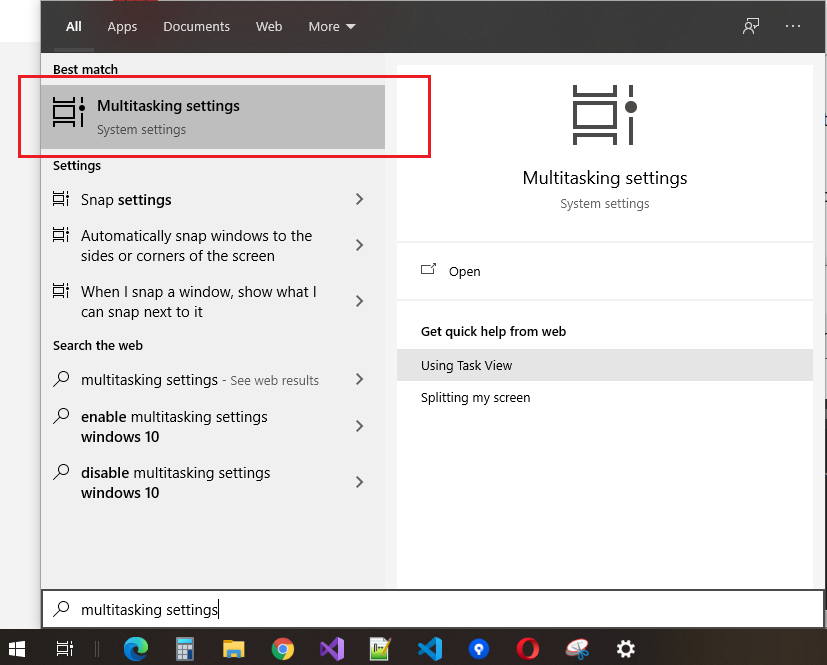
1. Open start window and start typing "Multitasking Settings" and click on the Multiasking Settings option as shown below:
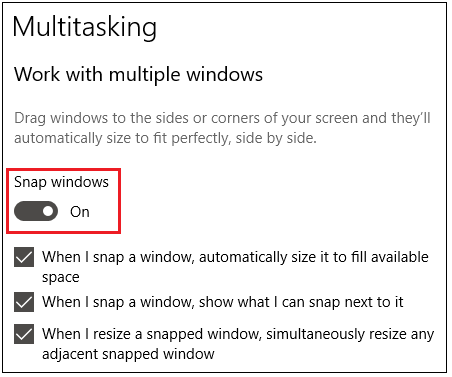
2. On the Multitasking Settings screen, keep the "Snap Windows" option turn on so that we can split the screen on Windows, if you disable this option, then user will not be able to split the screen in multiple sides.
How to Split / Snap Windows Screen:
1. Select the Title bar of the Open Window or the Window which you want to split to particular side of the screen and drag it to the side where you want to show, if you want to show it on left side, then drag it to left center side, if you want to show it to right side, then drag it to right center side, if you want to show it on left top side, then drag it to left top corner edge, if you want to show it on left bottom side, then drag the window to the left bottom corner edge, the same for right side you need to drag it to right top corner or right bottom corner.
2. Once you drag the screen it will highlight the size where it will be displayed, if it is the same location, then drop there, it will display at the same location.
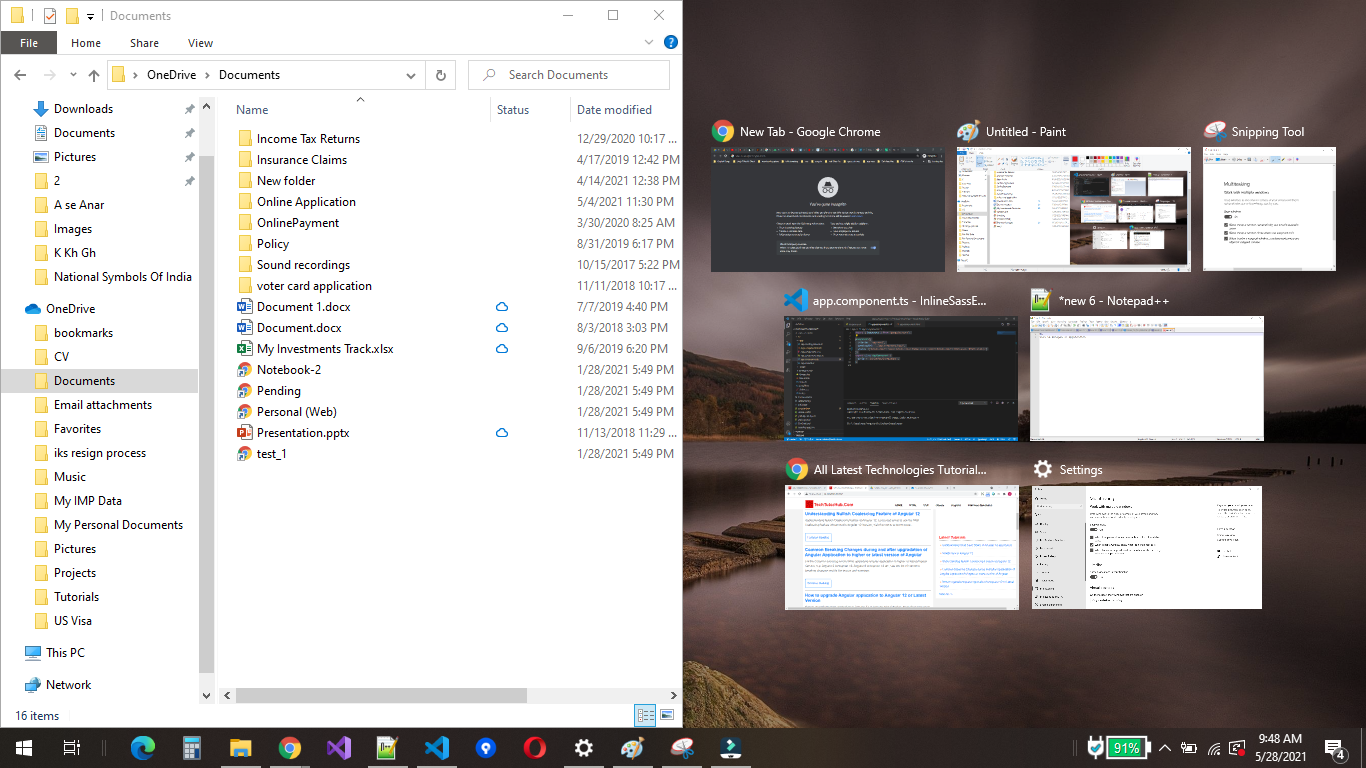
Below image, shows when we dragged and dropped the window on left side then it shows which Application to open on right side:
In total we can split the screen in 4 sides: As shown in the below image, we have to drag the window at the highlighted in red position to place the screen in particular side:
1. Top Left Side
2. Bottom Left Side
3. Top Right Side
4. Bottom Right Side
Watch a below Video to learn, how to exactly split the screen on Windows Computer: