How to Add and Use jQuery in Angular 2+ Application
jQuery is fast and feature rich JavaScript library which helps to work with the elements on the browser's page, using jQuery we can add, modify any HTML element on the browser, sometimes there is a requirement to use jQuery library to add any rich feature of jQuery in our Angular application, we can add and use jQuery in our Angular application using below steps:
Step 1: Create Angular application using below ng command: We can execute ng new command in Command Prompt
ng new jQueryAngularApp
The above ng new command will create Angular application with Application name as "jQueryAnguarApp" and it will create a directory with the Application Name and add the required Angular files in the that Project directory.
Step 2: Once application is created, now route to the application directory and open the Application code in Angular Code editor, we will be using Visual Studio Code to open the code
cd jQueryAngularApp
code .
The above command("code .") will open the Angular project in Visual Studio Code Editor.
Step 3: Now run the below command to add jquery library in your Angular application: We can run the below command in Terminal in Visual Studio Code else we can run it in Command Prompt:
npm install jquery --save
This command will install latest version of jquery in your Angular application, it will create the "jquery" folder in "node_modules" folder which exists in the root directory of your application. If we want to install any specific version of jquery in our Angular application, then use the below command, the below command will install jquery 3.0 version in Angular application:
npm install jquery@3.0 --save
We are using --save after npm install [PackageName] to save the Package in the dependencies section of package.json file. After NPM version 5.0.0, we don't have to specify --save after the npm install command, because it by default saves in the package.json dependencies.
Step 4: Now, we have to add the jquery reference(jquery.min.js) in the "scripts" section in angular.json file at Project=>architect=>build=>scripts location
"scripts": [
"node_modules/jquery/dist/jquery.min.js"
]
Step 5: Now, in app.component.ts we will use jQuery as shown below:
import { Component, OnInit } from '@angular/core';
declare var $: any;
@Component({
selector: 'app-root',
templateUrl: './app.component.html',
styleUrls: ['./app.component.css']
})
export class AppComponent implements OnInit {
title = 'jQueryAngularApp';
ngOnInit(){
$(document).ready(function() {
console.log('We are now in App Component ngOnInit Method');
alert('Application is ready!');
});
}
}
To use, jQuery in any Component page, we have to declare it using "declare var $:any" statement and then use it in the Component page using "$", in the above code, we have first declared $ and then used it in the ngOnInit() method.
We can also use other functions of jQuery such as "click" method in your Component page. e.g. $('#btnSubmit').click(function(){});
Step 6: Now run the Angular application using below command and see the output:
ng serve -o
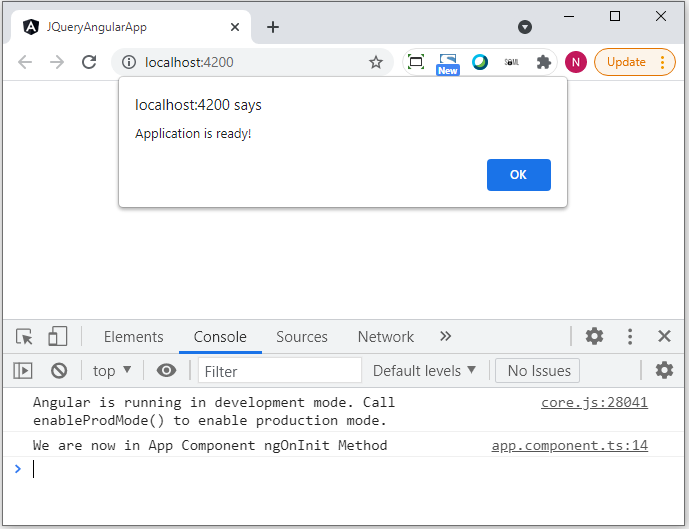
As we can see, we have now finished adding and using jQuery in our Angular Application, now we are running this project using above "ng serve" command, this builds and runs the project and it will open the project in the browser with the output as shown above. This is how we can add jQuery in our Angular application and use it in our Components pages of Angular App.