How to publish .NET Core 3 App to IIS 10
.NET Core has in built Internal Server called Kestral Server which helps .NET Core app to run on any operating System. Also .NET Core application can be hosted on IIS in Windows. Following steps help you to deploy .NET Core application on IIS 10, we require .NET Core Hosting Bundle installed on the machine to run the .NET Core app on IIS, See the following steps to deploy Dot NET Core 3.0 Application to IIS 10:
Requirements to Create, Deploy and Run DotNetCore Application on IIS:
1. Visual Studio (2017 / 2019) to create .NET Core application
2. IIS Manager 10 to Deploy the application
3. .NET Core Hosting Bundle, Download the .NET Core Hosting Module from Here , Please make sure you restart the IIS server post installation of .NET Core Hosting Module
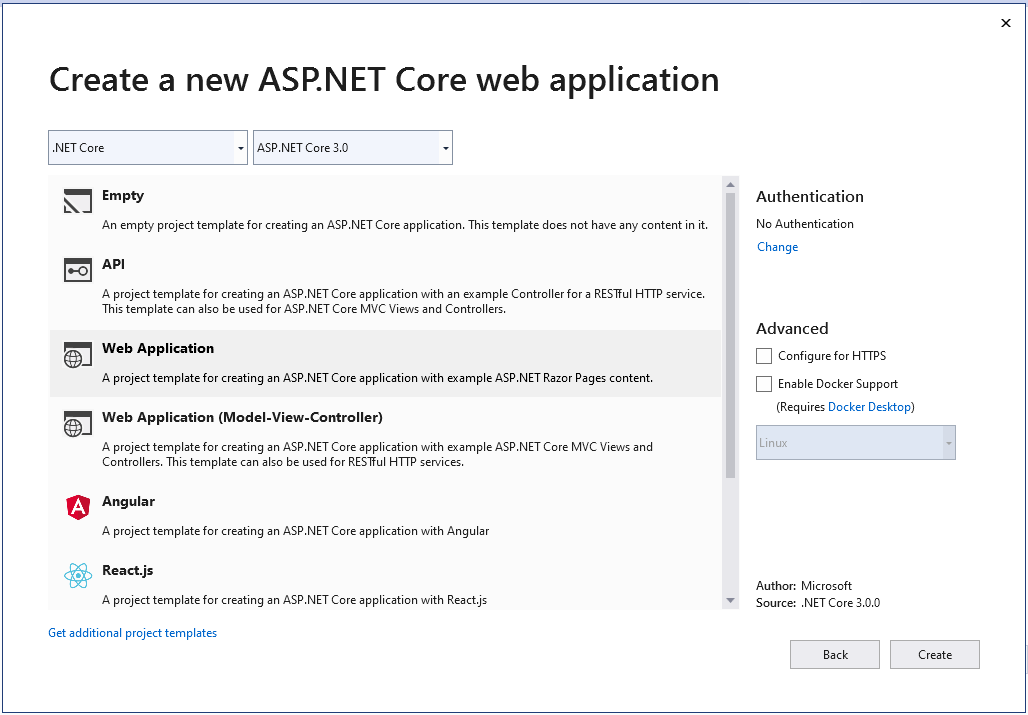
Step 1: Create the Application: Open the Visual Studio and Create .NET Core 3.0 Application
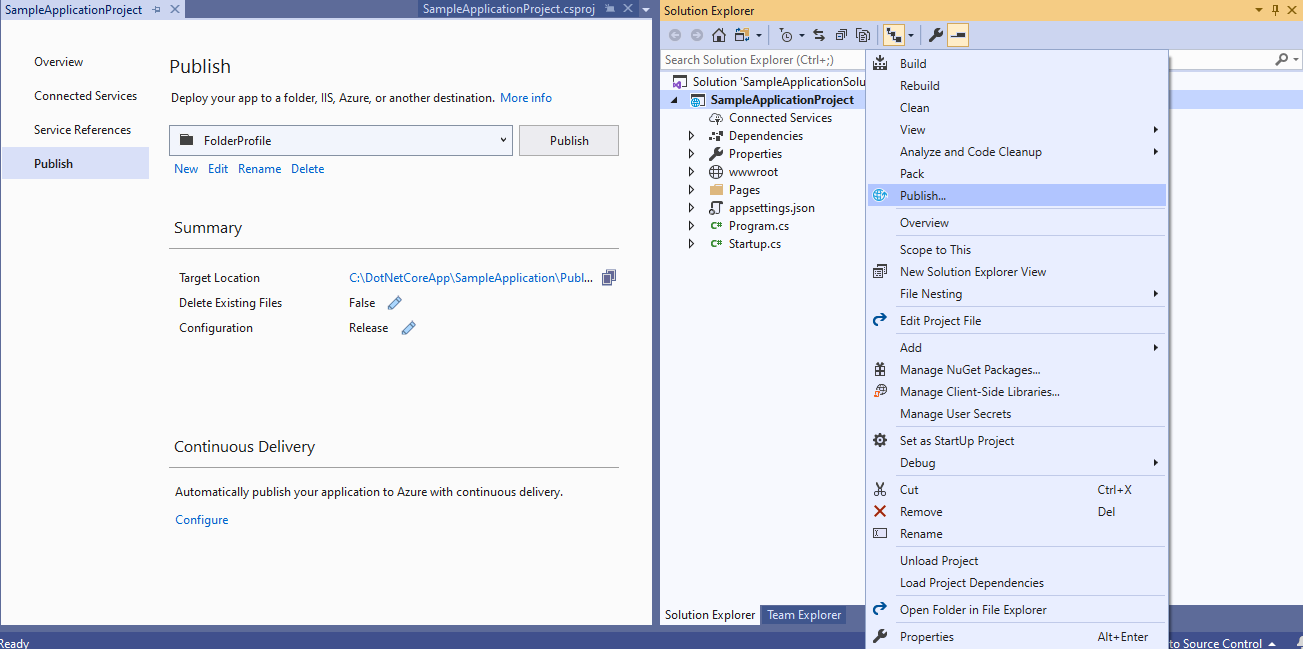
Step 2: Publish the application: After application is created in Visual Studio, publish the application, Right Click on the Project in the Solution Explorer and Click on Publish, Select Publish Method as "File System" and set the Target Location and click on Publish button.
Step 3: Deploy on IIS: Open the IIS from start menu OR from Run popup, type "inetmgr" and click on "OK" button to open IIS Manager
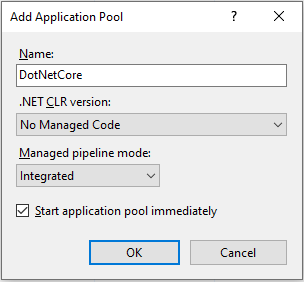
Step 3.1: Create the Application Pool: In IIS on right section click on "Add Application Pool..." link, In the Add Application Pool window, set the Name as "DotNetCore", Set .NET CLR Version as: "No Managed Code" & Managed Pipeline mode as: "Integrated", set the "Start application pool immediately" option as "Checked" and click on OK button to create the application pool
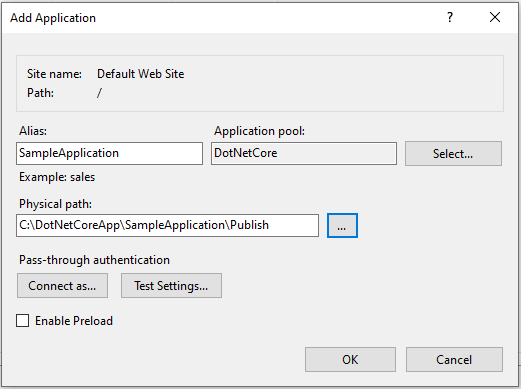
Step 3.2: Create Application in Default Web Site: In the left section on IIS, right click on "Default Web Site" option and click on "Add Application" option, In the "Add Application popup, enter the Alias of the application, select the Application pool as "DotNetCore" which we created in Step 3.1 and set the Physical path of the published folder where we published the application in Step 2, click on "OK" button to add the application in IIS.
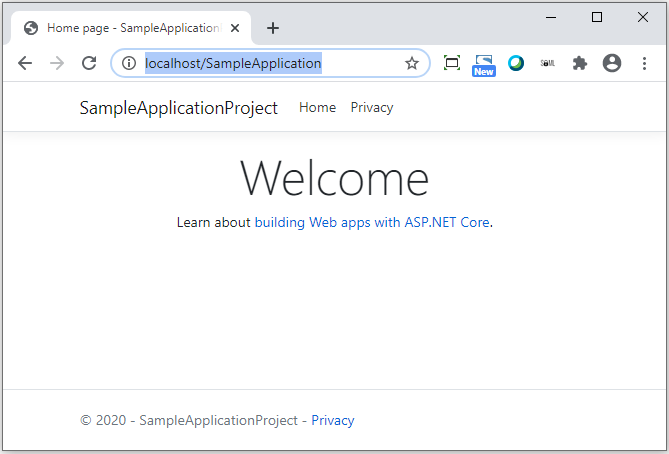
Step 4: Run the application: After application is deployed on IIS, run the application directly on the browser by entering following URL in the address bar: http://localhost/SampleApplication OR right click on the application in IIS and select Manage Application and Browse option to open website automatically in Browser.
If your application is not working after deploying on IIS, confirm you have installed .NET Core Hosting Bundle Module on your machine and also confirm whether Application Pool is configured properly and set properly to the application in IIS